 In the backcountry, sleep is a luxury, food is a nicety but water is imperative. When in the wild, one is exposed to the elements and likely exerting themselves in a manner outside the norm. Knowing where to locate water and how to treat it so that it’s safe to drink is a critical skill to offset these realities. Locating the water is only half the challenge however. Having done your map study and read trail notes all over the interweb you know what your route offers regarding water sources (don’t bet on this however) and as you move where to expect the next stream, spring or river. Treating said water to ensure you don’t have any microbes that will give you “the mung” (giardia, salmonella, cryptosporidium, etc.) is the other half of the equation.
Ounces equals pounds and pounds equals pain. For every 1 liter of liquid add 2.2 pounds. This forces us to carry only a finite amount. Any multi day trip or emergency scenario requires a plan to replenish your supply. As a “best practice” in the backcountry, we each carry at least three liters and weather, terrain and consumption dependent do everything we can to stay “topped off” during our trips. Water carry and management is also a consideration. To ensure we can accomplish this, we also carry multiple methods of carrying liquid (Camelbak, Nalgene and collapsible Platypus bottles) and just as importantly pack out redundant water filtration options. Below are some of the options you have that are proven and all under $100 USD: A popular method of filtration is the pump like water filter and the 11 oz.Katadyn Pro Hiker is my preference. Easily employed, the activated-carbon core filter is contained in a robust plastic case with a pump handle at the top and two hoses. The bottom hose offers a teardrop like supplemental filter at the end that you drop into the source that is capable of filtering larger contaminants before it runs through the main filter. The other hose is where the filtered water flows through one of a number of adapters that fit different water collection receptacles. From a level of effort perspective, the Katadyn pumps 1 liter of water every 48 pump strokes so it takes no time to fill a larger Camelbak or Nalagene. For cleaning the filter after repeated use, Katadyn offers their own cleaning solution, but we simply use 1 tablespoon of bleach in one liter of water and run it through the pump. We leave it out in the sun to dry after. Katadyn also sells a replacement element for the Pro Hiker that works with other filters as well. The original filter is effective to up to 1150 liters filtered. As with all gear that is life sustaining, redundancy is key. Having two Pro Hikers is obviously an option; however, it adds weight and bulk and we have other less bulky methods available. Using ultraviolet technology, the SteriPen Ultra is a good alternative or complementary tool to the pump method. The SteriPen is powered with an internal, chargeable battery capable of filtering up to 50 liters without recharge. The operation of the SteriPen is simple in that you scoop water into a water bottle and place the device into the water and turn it on; stirring the filter for about 90 seconds. The LED screen on the SteriPen will tell you if when it is complete (with a big smiley face). You can set the device to filter 1 liter or ½ liter. The SteriPen Ultra can be used up to eight thousand times and is 99.99% effective against a host of bacteria and protozoa. It also protects against cholera, dysentery, typhoid and botulism. Two points that make this not my “go to” option are that fact that it is electronic, thus requiring a charge (car, solar panel, etc.) and an even larger concern, it requires “clear water.” The SteriPen is not effective in “cloudy” water or with high levels of sediment. For the amazing water sources offered at Yosemite, not an issue; however, we have filtered springs that were far from “clear” with positive results using a pump that would have been a non-starter for the UV technology of SteriPen. To mitigate weight, maintenance and potential breakage or malfunction, one can simply avoid a pump or device and use tablets for water purification. The days of the gross halzone tabs used in the military are over, making way for products like Katadyn Micropur Purification tablets. Promising the same level of protection from the creepy crawlies in your water that UV or pumps offer, the 30 count pack weighs .9 ounces and equals a filtered output of 30 liters (equal to 10 fills of a large Camelbak). One tablet is needed per quart. The biggest obstacle to the tablet option is the wait time for it to take effect. Thirty minutes for Giardia and four hours for Cryptosporidium, so the end user should plan accordingly when thinking of when to “top off” and gauge water stops on their route. This option is also an excellent “Go Bag” addition due to its three year shelf life, weight and lack of maintenance. Thinking of extreme situations like Katrina, one can find themselves like Coleridge’s Ancient Mariner, “water, water everywhere and not a drop to drink.” When natural or man-made disaster compromises sewage and water supply simultaneously, one can understand the need to have a simple, light option available to care for your family and pets. A few other options in water treatment include life straws, gravity filtration bags and bottles with filters installed. Numbers of reputable companies have products that fall into one of these type collection/filtration methods. Water filtration through gravity is a thru-hiker favorite and allows for multi-tasking. Popular models are the Sawyer Complete Water Filtration System and the Platypus GravityWorks Filter system, although there are plenty of others on the market as well. Boasting all the same capabilities to combat bacteria, giardia etc. the end user simply fills one bag and hangs it up as he or she continues setting up camp. The water runs from the “gray” water bag to the reservoir bag completely filtered and ready for use. It can provide up to 1.3 liters of clean water a minute. We haven’t personally used this system but would love to try it soon. The Life Straw, which is a back up option on our packing list, is incredibly light and packable. Another “Go Bag” must have, the Life Straw is a mere 2 oz. and easily used. It is also one of the most inexpensive options we found. Simply pull the straw out and drink directly from the source or collect water in a Nalgene and drink. The filter offers the 99%+ protection level against all the same creeping crud the other filters do and is able to clean up to 1000 liters without replacement. To clean and avoid clogs, simply blow into the straw. Cons of the Life Straw include the inability to use with water bladders, cannot filter quantities of water for cooking, inconvenient “on the go” and not helpful for four legged friends. Several companies offer a water bottle with internal filter system loaded within. The Katadyn MyBottle is a good example of this technology. Just shy of 10 oz. empty, the MyBottle filter acts almost as an Life Straw system within the bottle itself. The filter is married with the mouthpiece, so the user fills the bottle from the source and drinks. Like the Life Straw, this method doesn’t offer the ability to filter clean water for cooking or topping off your bladders, etc and there is a great deal of complaint from people regarding the squeezing required to drink. The MyBottle holds 24 ounces of water and can be used 155 times before the filter needs to be replaced. As all filters reviewed, the MyBottle and other like models prevent the wide majority of bacteria and protozoa. Taste may be a chief complaint for any filtering options discussed when dealing with backcountry water. This might sound like a small consideration, but if you don’t “want” to drink, you won’t and it WILL cause you issues down the trail. Consider supplementing your packing list with something like Mio FIT or Powerade drops to add flavor and electrolytes. Water collection, carry, filtering and conservation are all terrific topics for any outdoor person to read up on and research. Go beyond this short blog and dig into the topic. See how it applies to your sport, activity or planning needs, then share with others. Hope you found this helpful. Stay safe. Keep Hiking Forward! Mike & Melanie Disclosure: Some of the links in this post are affiliate links. This means when you make a purchase, we receive a tiny bit of compensation at no added cost to you. We only promote products that we use and love, and any purchases you make go toward the cost of this blog. Thanks for all of your support, and if you ever have any questions about any of the products featured here, please comment and let us know.
2 Comments
 “Distrusting our capacity to be alone, we too quickly look to others to save us, often from ourselves,” writes Sarvananda in Solitude and Loneliness: A Buddhist View.
Hiking alone often gets a bad rap. What if something bad happens? Well, what if it doesn’t? Some of my most memorable and meaningful hikes have been solo. In the wilderness, with only yourself and the land to think about, you quickly master the art of “being present”, something that is way too easy to avoid these days. The upsides to hiking alone are many, and powerful. I didn’t realize this until after my first major solo hike. That experience came about largely by accident, when I was sent to Phoenix on a business trip. I had been doing quite a bit of day hiking with friends, and figured while I was in the area that I would take advantage of it and do some hiking in Arizona. I quickly decided I wanted to see Sedona, a place I had always heard great things about. Once I started consulting maps, I realized that I would also be within reach of the Grand Canyon, another place I hadn’t yet been. So I planned and executed a trip and my trip went exactly as planned, maybe even better. I chatted with people along Bear Mountain in Sedona who told me their son was working at the Grand Canyon and did the route I was planning. They bolstered my confidence that I could do it. Along my hike up Bright Angel Trail, I met another solo hiker who was doing the same route I was. We started chatting and ended up finishing the hike together. If I had been hiking with others, I doubt we would have stopped to chat with other people and I would have missed the opportunity to connect with someone doing the same unusual thing I was doing at the same time on the same day. So, based on personal experience, here are my top 5 reasons you should (sometimes) hike alone:
Keep Hiking Forward! Mike &Melanie 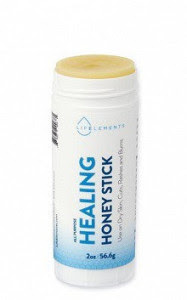 It's the dead of winter here on the East Coast, and we are spending a lot of time planning and daydreaming about our upcoming backpacking season. With so much down time, we have had the opportunity to test some items to see if they will make it into our packs this year. We camp too far away from civilization to carry anything we don't love, so anything that we bring has to have a purpose and make our lives better. Here are a few of my favorites so far! Lifelements Healing Honey Stick This is a great product that I actually got to test out on the trail at Mount Rogers on our last trip there. It's a lip balm, it's a salve, it's a moisturizer. There's not much these sticks can't do. I tested both the chapstick size and the larger 2 oz size. The chapstick size is perfect for backcountry trips where weight is counted in ounces and every bit counts. I am a bit of a chapstick addict, I have Burt's Bees in pretty much every backpack and jacket pocket and at home I have an Eos collection that could fill a shelf at Target. I like this because I can put it on in the morning and I don't find myself reaching for it constantly to reapply as I do some other chapsticks. I also really like that it is a multi function product, and I've used it on dry skin, bug bites, and other small annoyances with good results. I also love the fact that it is paraben free and cruelty free. It does contain nut butters though, so if you have a nut allergy, this is not the product for you.  Crispy Green Crispy Fruit After years of just existing on apples and strawberries that I dry myself in my dehydrator, I was excited to see some freeze dried fruit at the local grocer that was a bit different. I immediately fell in love with their tangerines. They have 6 other flavors, including pineapple, mango, cantaloupe, asian pear, apple, and banana. I've tried most of them and while I'm not a big fan of the cantaloupe (not their fault, it's good, just not for me!), the others are amazing and I can't wait to bring some along this season. They are super lightweight and delicious. One thing to consider is that most of the flavors are only around 40 calories per package, so they won't fulfill much in the way of caloric needs, but they will still be a welcome snack and a nice little blood sugar boost out on the trail. 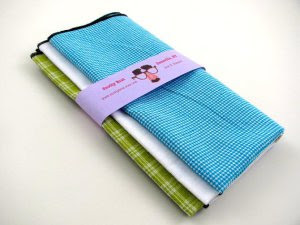 Snotty Brat Handkerchiefs
These aren't exactly new to my kit, as I've been carrying them for a couple of years now, but I finally broke down and ordered more for me as well as some for Mike. After spending time and money looking for soft hankies, these fit the bill and they come in great colors too. She will also customize them with a number of fun designs or your initials. I have used these for their intended purpose, blowing my nose, but they have also been super handy at wiping sweat, drying my feet after a soak in a cold creek, washing trail dirt off my legs, drying out our collapsible bowls, and more. They are reusable and have held up perfectly to many washings. They are also a much greener option than using baby wipes for everything. Baby wipes still have their place, but we use a lot less of them thanks to these babies. Have you found any favorites this winter that you will be putting in your pack? Let us know in the comments! Keep Hiking Forward! Mike and Melanie  For years within the backpacking community there has been debate about carrying a firearm on the trail. I myself have struggled with an internal debate both for & against the practice. In all my years in the backcountry, I have never had a run in with an animal (even the two legged kind) that required even a moments consideration to act with deadly force. I make the decision not to carry a weapon, long gun or concealed handgun, knowing that things can easily go sideways. It is a personal choice and I will likely continue hiking and backpacking without a firearm.
Having said that, I completely understand why one would carry a weapon in the woods. Far from help, predators of all types, ne’er do wells taking advantage of isolated areas for various illegal ventures all come into play. Geography plays a part too. If I was hiking the hills of Patagonia, Arizona, a stone’s throw from the US/Mexico border, I would absolutely sling my carbine. My intent of this blog is to just bring some considerations up if are considering bringing a firearm into the backcountry. Assuming you are an existing gun owner or are going to make a purchase to arm yourself, I advocate doing the research on all federal, state and local laws. Educate yourself on the rules of law regarding not only ownership and carry, but use of the firearm in a confrontation. What you are committing yourself to is a responsibility that can far exceed anything you’ve taken on in your life to date. Ensure you understand how your travel plans to / from the backcountry will impact your decision to carry and know the rules in all parks you may be going into / out of during your trip. Since 2010, firearms rules have been significantly relaxed in National Parks, but there are still expectations on your conduct in the park. Ignorance is not a defense. Safety goes without saying. You need to be able to safely manipulate the firearm regardless of being wet, dirty, tired and scared. Please don’t think for a moment plinking on the range with a .22 while following the four firearms safety rules makes you ready to carry a weapon in the backcountry. Assuming you have purchased a reliable, appropriate firearm for your need (I am not getting into type/caliber etc that is too expansive a topic for this blog) seeking out professional training is critical to make you “responsible” in responsible, armed citizen. Learning how to operate your weapon safely under a level of duress (shot timer, peer pressure) in a class is a terrific start. Understanding both the weapon and your limits and true capabilities will also be a likely result by training’s end. Once training is received, practice in a safe, reasonable manner with the weapon you will protect yourself with and DO NOT watch Instagram “gunfighters” performing derring do. Brilliance in the basics and consistency is the secret to good firearms practice. As backpackers, we love gear and firearms open you up to a host of gear needs for practice (hearing/eye protection, range bags, optics) and carry considerations. At the end of this article, I will provide a list of gear companies I believe are strong in design, quality and reputation for rifle and pistol use. One thing I will discuss because it goes to employment is holster selection and method of carry. A rifle sling on a long gun is a given. From a simple adjustable carrying strap to a tactical two point, the sling on a rifle is akin to the holster for a handgun; absolute must for carry, practicality and as an aid in marksmanship. As for a holster, I am not a proponent of open carry at all. I understand the virtue of getting to your weapon in a “time is life” scenario, but you need to accept the fact that a gun draws attention and you do not want unwelcome attention when you are dealing with strangers in the backcountry. No reason to show what you are carrying to someone you don’t know. Also when you are carrying a firearm, any altercation you may find yourself in is NOW a “gunfight.” Do not advertise that you have a gun and understand how to retain that weapon (again, go train) in a fight. Select a holster that is easily concealable and has a decent level of retention, but works with a backpack’s hip belt and will remain tight to your body to allow not only concealment, but comfort in hiking/movement. It is your choice for “inside the waist band” or “Appendix carry,” but I would advocate a strong side, hip holster or even a chest/fanny type rig like Hill People Gear sell. After your selection of carry method, ensure you practice with your choice both with a pack on and without. And always carry a small light with you to identify targets and background. Shooting a firearm is 100% visual. The content above is simply a primer; a start to a longer conversation. Carrying on the trail, as in life, offers a host of complex considerations that should not be taken lightly. Understand the law, act in a safe, responsible manner and train like your life and the lives of your loved ones depend on it. Do your research, think about it and practice. Gear List (recommendation based on experience with the company): ● Range Gear:
● Holsters: ○ Ares, Jones, Milt Sparks, Safariland Concealment/Soft Clothes ○ AWS, Ronin Tactics Duty/Military Style ○ Raven Concealment, Off the Grid, Safariland, GCode Kydex ○ Milt Sparks, Greg Kramer, Mitch Rosen Leather ○ Hill People Gear chest rig (haven’t tried this myself, but it’s on the list) As with any gear “Buy cheap, buy twice” Do you carry a weapon when hiking or backpacking? We'd love to know why or why not. Drop us a comment! See you on the trail and be safe. Keep Hiking Forward! Mike & Melanie! 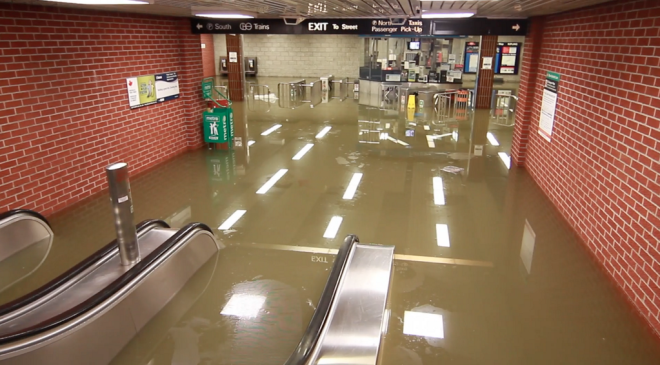 By definition a Go Bag is created to care for emergency situations of unknown origin and severity. Consider Super Storm Sandy or Hurricane Katrina as an example of situations anyone of us can find ourselves in with little or no warning. As we have learned from those disasters, people in an urban or city environment are just as at risk as those in rural areas, maybe even more so. We as humans tend to get comfortable with our living conditions and can easily forget how disastrous it can be when infrastructure fails and there is no heat, electricity, or clean water. Our hope is that you take this advice and apply it to your lifestyle and environment as best you can, and hopefully you will never need to utilize the information or equipment. As the famous quote from Ben Franklin reminds us "by failing to prepare, you are preparing to fail". We realize it is unrealistic to think a gym bag or backpack would be large enough to accommodate all the needs of every "what if" one can imagine. The subject of this blog is to provide some guidance on the basics of a "Go Bag." From this template, you can modify or enhance based on the environment, threat or situation. The Bag: As a backpacker, I go to a pack type configuration as my favored option. Any sturdy day pack of 30-35Liters is sufficient for the basics of a Go Bag with room to spare for your situational needs. By choosing a pack from a reputable company that offers some features like robust suspension, hydration bladder compatibility and multiple pockets you are ahead of the power curve. You just never know when you will have to be foot mobile so the better the load carry capability the more flexibility you have. For that reason, I do not recommend a gym bag or box of some sort (rubber maid, ammo can, etc). First Aid: I look at first aid as a three tiered system:
Purification of water when facing the unknown is critical. I become obsessive about water when we hike (everything is linked to when do we get to the next source; caring for my filter like a newborn) and in an extreme situation the last thing you need is coming down with the Mung or other stomach funk that drains you, dehydrates you and eventually can kill you. Another thing I am a believer in is redundancy so mixing into your Go Bag two of your preferred purification methods is recommended. These can be a filter, SteriPen, LifeStraw, purifying tablets, or any of the other purification gadgets currently available. Ensure you have equipment that will sustain you for a significant length of time, easy to use/practical and you have confidence in its function and maintainability. REI carries a wide variety of options, just make sure whichever option(s) you choose, you know how to use them properly. A hydration bladder is a terrific option for a Go Bag and I recommend you consider adding one. They are virtually weightless when empty and offers hands free hydration options and ease the purification process. Camelbak, Platypus and Osprey have all engineered the bladders to be extremely robust and tough; however, I am a proponent of adding a Nalgene to your bag as well. It can act as a waterproof storage container and will not puncture or crack under even the most extreme abuse. The Nalgene also offers true extreme water collection in the use of solar stills, capturing rain, etc. Fire, Shelter, Food and Signal: Like purification, you have a myriad of fire starting options and as mentioned earlier redundancy is value add. Both my partner and I have magnesium fire starting/striker style tools and we both carry dryer lint in a ziploc. This is a terrific mix for starting a fire under almost any condition. Like the medical piece, I do recommend you enhance your soft skills by YouTubing some basic fire starting methods (the primitive ones are good to understand as well) and practice on a day hike or in the back yard when the pressure isn't on. I also carry disposable lighters and waterproof matches. Before meeting Melanie, I never slept in a tent while backpacking so I base my recommendations for a Go Bag on this experience. A military style poncho (material is bombproof) or a tarp with 550 (para) cord and some lightweight bungees make a terrific lightweight shelter that provides a variety of options. It can also be used as a litter and water collection point. Dental floss with a small sewing need inside the case made it into my Escape and Evasion kit for Afghanistan. It is virtually unbreakable, can be used to sew / repair materials and lash shelters together. Supplementing shelter with good, multi use garments (waterproof/water resistant and insulating) are critical. I recommend an Arc Teryx Atom jacket or like layer as the one go to. Additional socks from DarnTough or Smart Wool are also a good add and can not only act as their intended function but as gloves, bandages or pot holders. A pair of light trail pants, preferably with DWR finish, should also be considered. As a bald guy, I always go with a wool watch cap. We all know when your feet are cold put on a hat - enough said. Wool and its synthetic brethren over cotton for its wicking and insulating properties is the best material. Wool not only insulates when it's wet and dry, but it also repels odors, so you can wear the same base layers for days without grossing out anyone within 20 feet of you. Remember "cotton kills." Throw in a couple of space blankets as well, they can add extra warmth to a sleeping bag or be used as a shelter or windbreak. For food, we as outdoors people understand the virtue of high calorie nutrition in small packages, and this holds true for both hiking/camping and emergency situations. Refer to Melanie's extensive discussion on the subject here. Adding fuel and a Jet Boil to the Go Bag to accommodate the dehydrated food recommended is a good idea, but realize that it will be difficult to sustain (fuel) in a protracted situation/incident or extreme environment. Depending on the length of emergency, consider food alternatives and rationing as part of your planning. Adding a titanium/lightweight pot to your bag will assist in mitigating this longer term risk. It can also act as a water collection receptacle and signal device (bang on that joker). Lightweight is key here, remember you may be carrying your stuff for unknown distances over unknown terrain. Ramen noodles are light to carry easy to cook, and high in calories. The tuna salad kits they sell are great too and come with crackers to help give a nice balance of protein and carbs. Light is a terrific signal device. Travels incredibly far and in modern flashlights comes in bombproof, light packages. I am a huge fan of Surefire, having employed one in combat under a variety of conditions. With an investment of a little over $100 one can have 600 lumens in a package a little bigger than a roll of quarters (buy extra batteries too). A good light like this can also scare animals, act as a striking device and blind a ne'er do well. Additional signal devices in small packages include strobe lights, "Glow" Sticks and a signal mirror (Walmart ones are about $5). With some of the 550 cord you bring, you can tie a "Glow" stick on one end of the string and create what we call a "buzz saw," by swinging it around in a circle over your head. Perfect to signal rescue aircraft or foot mobile search parties. Of course, the ultimate signal device of the modern age, our cell phones will always be with us in a bad situation. Add to it a charger with multiple recharging usage and a solar panel if possible. It is always good to consider that in many situations cell service or even electric may not be an option so cell phones are a terrific tool, but not one to rely on. And without a phone how will one find their way? Waze isn't working you say? Land navigation is a critical skill to us as backpackers, but we even lean on technology with GPS use. Remember our brains and a Silva Ranger don't use batteries. Have in your Go Bag maps of the area at the least and a good solid compass and like medical skills, you need to seek training on this perishable skill. If you live in an area prone to certain types of natural disasters (earthquakes, hurricanes, etc.), you should plan ahead and choose at least two places you could evacuate to if necessary and know how to get there by car and by foot. Weapons and Tools: Now when I thought to write about this subject I wanted to lean heavily on our backpacking roots and avoid the "Doomsday Prepper" feel that many Go Bag articles lean toward. That being said adding a firearm to a Go Bag does provide protection from animals (two legged kind included) and can put meat on the table so it should be considered within the packing list. You can debate on type and caliber all day and like any tool there isn't one "go to" firearm for every situation. Training in the safe operation of the weapon selected is paramount. After that an understanding of its capability and having it "zeroed" (where you aim is where the bullet will hit at a determined distance) is next. From there I advise you become proficient with your selection with realistic practice. Shoot against a time standard with paper targets to record your shots and progress. Shooting beer bottles in the lot out back isn't going to cut it here. A good knife is important too. A heavy, fixed blade knife can be used as a striking tool, firestarter and overall cutting tool. It can be used for protection and skinning game as well. I do suggest staying away from the "Rambo" foot long pig sticker. Gerber, K Bar and Benchmade all make variants that balance size, weight and utility. A sharpener is always a good add and is light weight.A folding saw and multi-tool should round out your tools for the Go Bag. Mindset: The Go Bag has the equipment you need to stay alive, but if you don't know how to implement that equipment, you are still at risk. The most important thing you have is your training and knowledge. Throughout this blog, I reference a need for training in medical skills, fire starting and firearms training. Sustained training in these type skills can easily be the difference in a bad situation. Overall mindset is important as well. Realize that you are planning for contingencies involving worst case scenarios of various origin. You may be called upon to make choices and do things that are well outside of your comfort zone, even as an avid backpacker and outdoors person, and realize that you can't "set your clock" on the incident that prompted you to go to the "bag." You need to be prepared for a protracted event of unknown origin. It's tough. Also consider not only your tools and skills, but your role as a leader for your family and loved ones. Do they know the plan? Have you selected and communicated rendezvous points in case of a situation? Think about our days in elementary school during a fire drill. We assemble at the flag pole for a headcount and NO TALKING! Have a plan that is clear, concise and communicated. Collect your party at the rendezvous and then implement your overall plan applying your skills and Go Bag. If you choose to take this information and build out your Go Bag try and have fun with it. Consider being a minimalist. How much can I get in this bag of value? What training would apply? Get your kids involved and consider having a survival themed camping trip Think about things like The Walking Dead and how they overcome certain challenges and what obvious challenges they ignore (as is the luxury of being a TV show and not real life). Keep it fun and educational for yourself and your loved ones and practice often. You'll definitely be glad you did if disaster ever strikes! Stay safe. Keep Hiking Forward! Mike & Melanie 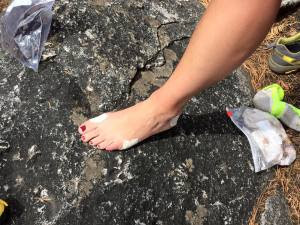 Athletic tape...by far the #1 most useful item in my kit! Athletic tape...by far the #1 most useful item in my kit! We largely live in a world where medical treatment is only a phone call away. But in the wilderness, there's no 911. When you are injured and miles from help, you have only a couple of things that will help you: your brain and a well stocked first aid & emergency kit. My kit has been a work in progress since I began hiking and camping and I finally feel like I have exactly what I need for minor and major medical issues. I actually carry two "emergency" kits, one is my first aid kit, and the other is for more general emergencies like inclement weather, getting stranded, etc. I will talk about both kits in this post. I was lucky that when I first started hiking, I had some experienced friends to guide me. One of the most important things they taught me was to always carry a first aid kit. Even on the shortest of hikes, it gives peace of mind and can help treat something that can start as an annoyance but turn into something more painful or dangerous if left untreated. My first kit was an Adventure Medical Kit, and I still use the cool waterproof pouch, though the contents have changed since I got it. I bought the .7 size which states it's good for 1-2 people for 1-4 day trips. It came stocked with the usual: bandages, gauze, a variety of topicals for burns, stings, cuts, etc., over the counter meds, latex gloves, and a tiny roll of duct tape. Right from the start I added a roll of athletic tape, which was a lifesaver when I twisted and fractured my ankle about 3 miles from the car. I was able to stabilize the ankle and walk out on it without doing more damage to it or being in too much pain. Over the first year or two that I had the kit, I mostly used the bandages, triple antibiotic, and ibuprofen. The gloves came in very handy when I was on a hike with a group of patients from my former job and someone who I was aware was HIV and Hepatitis C positive needed some wound care. I would restock those items as needed, but felt like I was carrying some stuff that I would likely never use and that there were other things I would need that I did not have. Once I began doing more extreme type hikes, longer trips, and frequent rock climbing, I slowly began adding things to my kit so that it would have all the things I might need while still being light and portable.  Everything pictured fits neatly into the waterproof pouch at the top left The things I always have in my kit no matter how far I'm going:
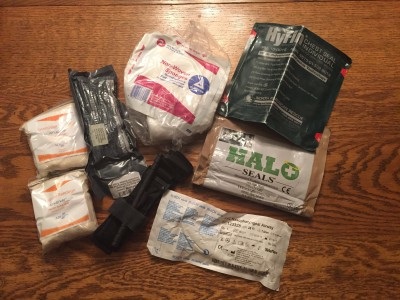 Trauma Supplies Mike carries a trauma kit when we go on overnight or longer trips much like the one he uses when deployed. Most of this stuff is probably overkill for your average hike or camping trip, but he knows how to use it and it doesn't hurt to bring it. The kit contains the following items (ensure you know how to use them and have proper first aid training):
For those just starting out, I highly recommend getting a lightweight kit like the Adventure Medical Kits and adding things like extra ibuprofen, moleskin, dental floss, athletic tape, and upgraded bandages like Tegaderm or more heavy duty Band-aids.Especially on overnight trips or long mileage hikes, bring more bandaids than you think you need. You can then create a second bag with your emergency blanket, matches, flashlight or headlamp, water purification tablets, etc. Check your flashlight and headlamp before each trip and bring spare batteries. Mike's headlamp stopped working in Yosemite, we put in fresh batteries and it still didn't work. I always bring a spare light that clips on to a baseball hat which he was able to use to find his way around camp after dark. We sent the headlamp back to Petzl when we got home and they returned it to us saying it works fine. It's been fine ever since, and must have just been a glitch, but that just shows the importance of checking your gear regularly. What are your must-have items in your first aid kit? Let us know in the comments! Keep Hiking Forward! Mike and Melanie Disclosure: Some of the links in this post are affiliate links. This means when you make a purchase, we receive a tiny bit of compensation at no added cost to you. We only promote products that we use and love, and any purchases you make go toward the cost of this blog. Thanks for all of your support, and if you ever have any questions about any of the products featured here, please comment and let us know! 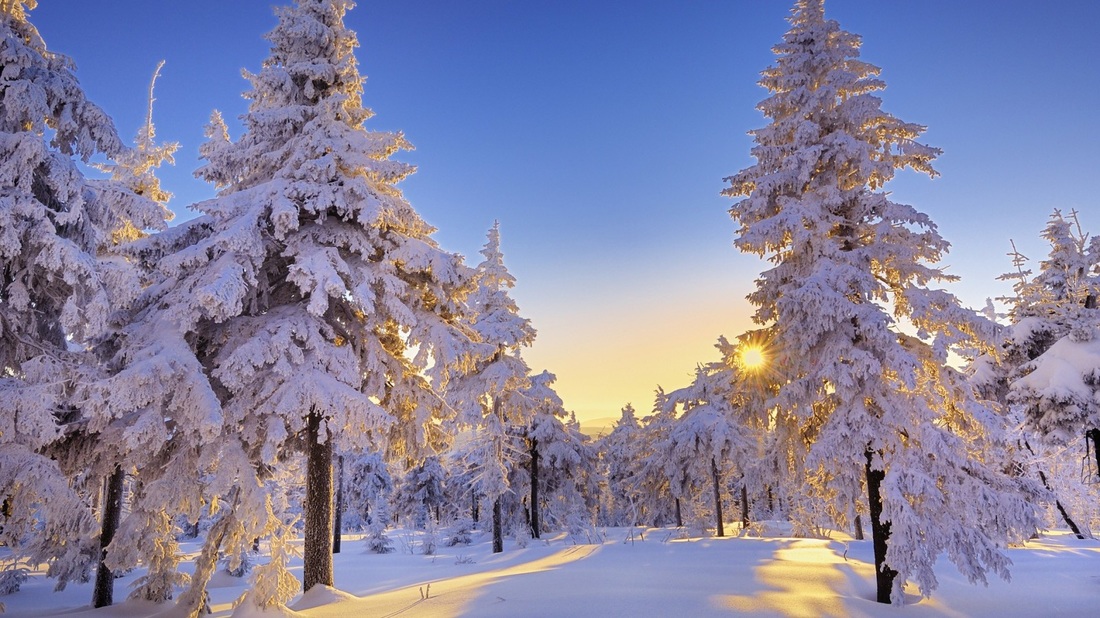 With the temperatures dropping quickly (we had our first frost a few days ago!), if we still want to spend time hiking and camping, we will need to prepare a little differently. Winter tends to be colder, windier, and wetter. The days are much shorter, which means less hours on the trail. Footing can become more dangerous. However, do not let that list scare you away from camping and hiking when the seasons change, because there is one HUGE advantage to the cold dark days of winter. NO BUGS!!! (Insert happy dance) For the purposes of this blog, I won't be getting into trips where things like snowshoes, crampons, or sleds are needed. That falls into mountaineering and I lack advanced knowledge about that.
Mike has done a significant amount of cold weather camping and hiking. I have hiked in all sorts of conditions, but haven't backpacked in the dead of winter yet. So that leads me to my first tip: go with someone who knows. As with anything new, it always helps and makes things safer if you learn from someone with experience. But if the weather isn't too severe and you think you want to get a taste of what it's like in the winter, I still recommend not taking on this experience by yourself for the first time. Symptoms of hypothermia, altitude sickness, and dehydration can be hard to spot when you are the one suffering. For that reason, I recommend having a buddy or 2 along to help keep an eye on each other to prevent something minor from turning into a true emergency. Plan, plan, plan For your first winter camping trip, I would recommend going to an area that you are familiar with. But if you can't do that, get your maps ahead of time, look carefully at the routes, the elevation changes, & the location of shelters. Remember, you will have less daylight hours to work with, so plan your distances accordingly. Hiking through snow and/or ice will slow you down too, so you should plan on reducing your daily mileage by 50%. Know where the nearest help is located (Ranger's station or such). Know how far away you will be from your vehicle or help throughout the route. Basically, just know where you will be and where you are going as well as planning some bail out spots or routes just in case. Let someone at home know your plan and educate them on when they need to call for help for you. Let everyone in your group know the plan as well as contingency plans in case you become unable to lead the group for some reason. Keep a close eye on the weather leading up to your trip You can find backcountry weather reports at the National Weather Service site. If the area you are visiting has a website that they update (like the National Park system), check prior to your trip for alerts, trail closures, weather reports, etc. If you are traveling in an area prone to avalanches, check avalanche reports and avoid slopes of more than 20 degrees unless you have specialized avalanche training. Don't be fooled if the forecast calls for some warm days. This may just help snow and ice to melt and refreeze each day which can create difficult to see "black ice" and can make conditions tricky. Warm days can also lead to runoff and turn a babbling brook into a raging river, so keep in mind how the weather will affect water crossings. Understanding how the weather fluctuations affect the area you will be utilizing can help you plan better. Dress for the conditions In winter, it is more important than ever to follow a tried and true layering system. In addition to layering properly, in winter you will want to put away the trail runners and use boots. They will give you extra stability on slick footing, they will help prevent snow and moisture from getting into your shoes, and they provide more insulation than low cut shoes. If you will be in deep snow, you may want to also plan on using gaiters to help keep your feet dry and warm. Wool socks are a must, as they insulate even when wet. For wet conditions, I've heard good things about Goretex socks as well, but haven't tried them. I carry a pair of Neoprene socks that I can use if my feet are going to be wet for a while, and those can even be layered with a thin wool sock underneath. Always bring a warm hat, gloves or mittens, and sunglasses or goggles. Also, always bring a spare pair of gloves or mittens and a hat, because if you lose those items, your trip will take a turn for the worse quickly. Evaluate your gear You will need a sleeping pad that offers insulation from the cold ground, a sleeping bag rated for the conditions you will face, and a pack big enough to carry the extra layers and gear that winter camping demands. A tarp or footprint for your tent will help keep snow and water from seeping in and making you cold. If you have a sleeping bag that isn't going to be quite warm enough, a good liner can add another 15 degrees of warmth. There are many types of liners, and you can read about them and their various features here. If you find yourself without a liner in conditions that are too cold for your bag, anemergency blanket can be used as a liner in a pinch. A good sleeping pad arrangement for winter camping is to use two pads, a closed cell and aninflatable. The closed cell should be on the ground with the inflatable pad on top of it. This will provide enough insulation from the cold ground and having a closed cell pad is extra insurance should your inflatable pad spring a leak. Using a winter gear checklist can help prevent forgetting important items. Eat to stay warm Eating enough calories is one way to help your body stay warm, and your body burns more calories in the cold. Besides the extra calorie burn from staying warm, hiking through snow or challenging winter terrain adds to the number of calories you will be depleting. Plan to add at least 25% more calories to your diet in cold weather. For this reason, dehydrated meals are great. They are warm, have some water content, are usually pretty high in calories, and are comforting. Another tip is to bring along a small amount of olive or coconut oil. You can add a tablespoon to your meal or just eat it straight for an extra 120 calories. Remember you will need more fuel to heat water in cold weather, so make sure you bring plenty! Packets of hot chocolate, hot cider, or tea bags make a nice pick me up beverage when you need one before bed or in the cold, cold morning. Learn first aid Many symptoms of things like hypothermia, shock, dehydration, etc., are often subtle and may go unnoticed by an untrained eye. It's important to begin treating these things immediately and appropriately, as an injury or illness compounded by exposure to extreme weather can quickly become a life or death situation. Starting out your trip being properly hydrated, nourished, and dressed can go a long way to preventing conditions from developing. Ensure that you have adequate food and water, our bodies burn calories keeping warm, so it's important to make sure you keep "stoking the fire". Hydration helps keep your circulation flowing efficiently. Many people make the mistake of not drinking enough fluids in cold weather because they don't feel thirsty, but the dry wind can dehydrate you rapidly. Other tips and hacks You can put damp socks, mittens, and other small items inside your sleeping bag at night to help them dry. This won't work for large items, as they will add too much moisture to the inside of your bag and end up making you colder. Place your boots in a sack and put them at the bottom of your sleeping bag at night so they are dry and warm in the morning. Put water next to you, away from the tent wall to keep it from freezing. If you are using bottles, place them upside down. Water freezes from the top down, so when you flip it over, you will have water to drink right away and ice won't clog up the spout or top of your bottle. Use lithium batteries when possible, they tolerate cold temperatures better than traditional batteries.Make sure your tent has enough ventilation for water vapor to escape. If not, the condensation build up will make your sleeping bag and everything else in the tent damp and cold. Do not put your whole head inside your sleeping bag. The moisture from your breath will cancel out the insulating properties of your sleeping bag. Carry a sleeping bag warmer for emergencies. Carry some hand warmers just because they are nice to have and can help warm up frozen boots or cold hands & feet. There is certainly a lot more that could be said about winter camping and hiking, and we will cover some more advanced camping skills in future posts. In our part of the country, winter is long and cold, so any fun you can have while waiting for spring to come is much needed. Hopefully these tips will encourage you to get outside this winter too. Being prepared and educated about how to handle the conditions will keep you safe and make your trips fun! Keep Hiking Forward! Melanie  photo from Triple Aught Design website photo from Triple Aught Design website Both Melanie and I are planners by virtue of our backgrounds so when we started to list subjects we wanted to tackle for content I wanted to talk about some of the more boutique gear companies out there doing innovative designs with form, function, good QA/QC and guerrilla marketing. One of the older, yet still boutique gear companies out there is San Francisco based Triple Aught Design (aka TAD Gear). The name Triple Aught is a reference to the three zero moniker (000) engineers use to speak in thousandths of an inch, a value of high tolerance and quality control. The company maintains a robust, thoughtful website and two local retail outlets in San Francisco. During our recent trip to Yosemite, we went to the "Dog Patch" section of San Francisco to one of the stores. We also visited Mrs Doubtfire's house but that is for another blog. The store is located in a converted warehouse that still boasts a steel roll up door and "changing rooms" made from wool blankets hung from a string. Don't get me wrong. The presentation is far from shabby. It was simple, clean and well laid out with a classroom in the rear for their CORE classes (more on that in a moment). The onsite customer service was excellent and I quickly learned they offer a first responder/military/veterans pro deal of 15% off retail. So lets get to the "Gear" of TAD Gear. They break up their line into Apparel and Equipment, each with a diverse mix of products. The equipment is broken out into Packs and Pouches, Knives, Lights and Tools. The firm's flagship pack is the FAST Pack EDC, a 1000 denier cordura day pack with a generous beavertail and robust belt system. Like most of the their line, both this pack and the smaller FAST Pack LiteSpeed are offered in their coyote brown and foliage green colors. You will find when you scan the website that both equipment and apparel share a muted palette of autumn colors and black/grey scale. This works from a practical sense (covers dirt/wear) and a tactical sense (big part of their customer base is military and police special operations). The pouch line offers internal and external modularity to the pack series and both packs have leveraged the military Pouch Attachment Ladder System (PALS) webbing (mistakenly referred to as MOLLE by some) to add proprietary pouches, as well as military issue equipment. Now I am not a knife guy. That is a whole other world that I have only a glancing understanding of, but by name (Winkler) and appearance the high end and custom line of knives and occasional hatchet are top drawer. I have no experience with their lights and don't know anyone who does (My friends and I have bet our lives on Surefire on more than one occasion) however, like most of their designs they appear slick and lean heavily toward practical functionality. 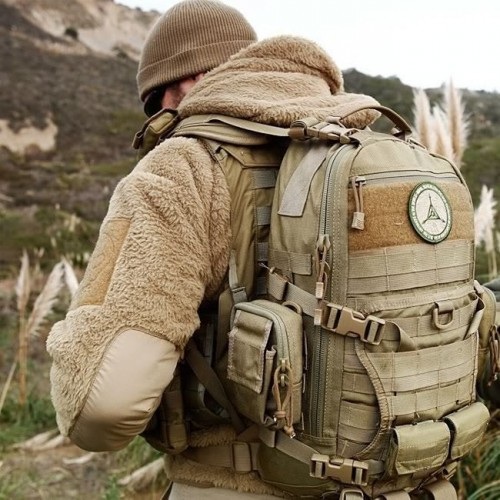 The company's Tool line is without a doubt the most eclectic mix of cool guy stuff. From their super cool Titanium Short Spork that Melanie and I both coveted to the Skeleton Key, a oddly shaped multi tool w/ the TAD Gear skull festooned on the top. Each piece of hardware is made of quality materials, sleek lines and innovative design. The website provides detailed descriptions and photographs. My direct experience with Triple Aught stems from the clothing line. As stated, all of their clothes are what can be called tacticool color wise; however, the mix of colors is more aesthetically pleasing compared to the more tactically focused clothing lines of Crye Precision, Patagonia's military line or Arc'teryx LEAF. YKK zippers, double stitching and thoughtful design are all apparent and sizes are true. Their line of hard and soft shells all provide top of the line materials, user focused design and durability. A knock to the company that the salesperson was happy to assure us is soon to change is the lack of design options for ladies. Melanie was in love with their Stealth hoodie, but even the men's XS was not a good fit, so I know when it comes out in a women's version it will almost certainly be added to her extensive collection of jackets. I think the companies strength lies in their insulating layers. In the past, I have owned their Ranger hoodie and a merino wool zip up cardigan with full turtle style neck. With past experience with TNF Denali and Mountain Hardwear windstopper fleece jackets ,TAD's Ranger hoodie is hands down the best fleece jacket I have owned. With a hood that accommodates a helmet, thumb holes, pit zips and windstopper materials, I swore by this jacket during a winter in Eastern Afghanistan. The sweater I owned is no longer part of their line; however, all their merino wool apparel is soft, simply designed and is at home in town and the backcountry. While in the San Francisco store, I bought their Force 10 cargo pants. The entire line of pants appears well designed w/ ample pockets located in a common sense fashion. The fit is true (maybe a little generous in the waist) supplemented with large belt loops. The different cuts of pant are offered in a variety of materials as well. I have yet to really shake these pants out but with fall upon us, I will begin to wear them on our trips and day hikes, replacing their equivalent from Arc'teryx. 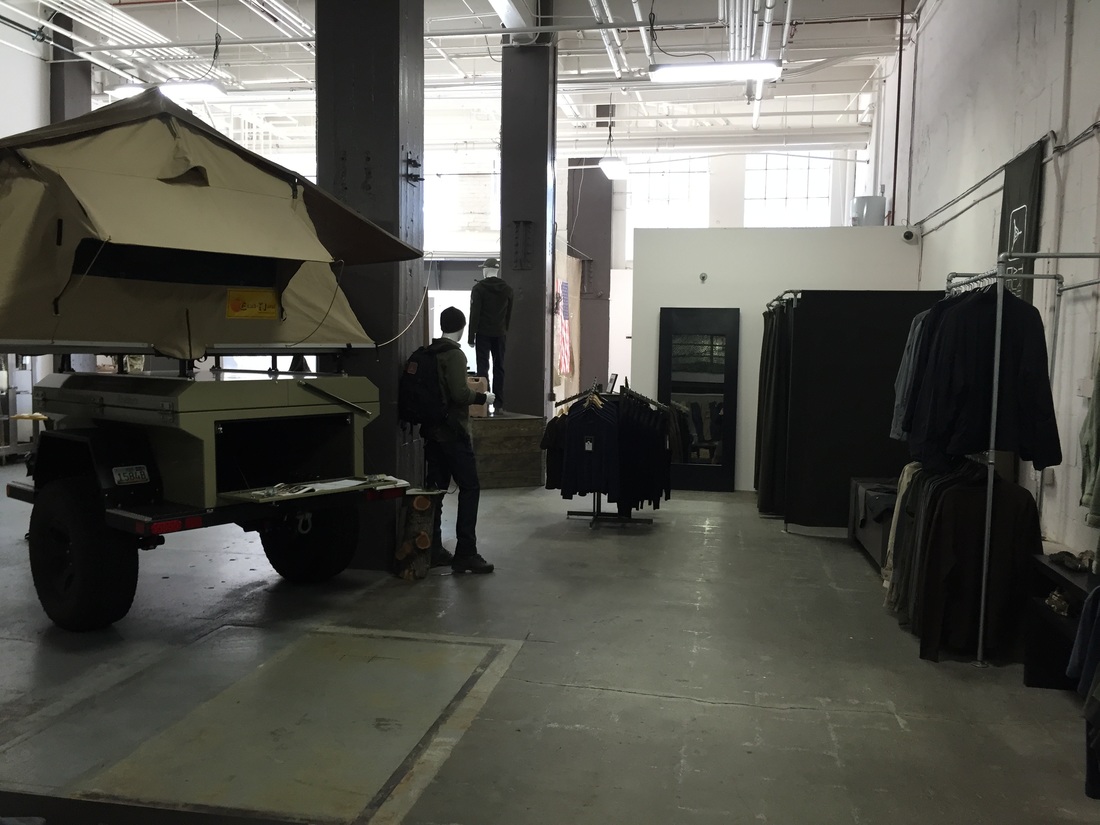 With the thousands of dollars I have spent on gear that falls short, TAD has never let me down. But keep in mind the old axiom, "Buy once, Cry once." They are close in pricing with your higher end companies like Arc Teryx and Patagonia, but if you spend that money you won't have issue w/ quality, fit or support. Another caveat when working with Triple Aught is product availability. They are a small company and with that run a tight inventory control program so outages by design or size is a common occurrence. I followed up with them on an item through Facebook and received an immediate response to item availability questions and for me that goes miles toward return business.
Alongside their gear selection, Triple Aught is offering in the San Francisco area a myriad of classes like Field Forecasting, a course on weather prediction sans technology, wilderness medicine and esoteric skills like their Black Box curriculum, a kidnap and ransom mitigation course. They also offer combative style courses in Extreme Close Quarters Combat (ECQC) and knife fighting; all taught by local law enforcement subject matter experts. I strongly encourage a visit to the website and Facebook page to really take in all that TAD offers. They have stayed close to their roots, design gear with a unique mix of style and function and continue to support the communities they serve. Keep Hiking Forward! Mike 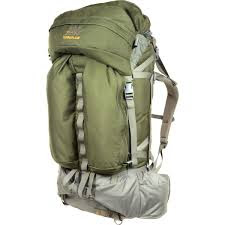 Multi day trips to the backcountry require a good pack. One that handles the weight with a level of comfort that doesn't fatigue the user and offers protection to his/her belongings from the elements. Within that general need lies an entire focus of some major outdoor companies product lines and in some more boutique firms their entire offering. As a wilderness counselor, I gravitated toward the bombproof construction and end user focus of pack designer Dana Gleason. When I came aboard, the veteran counselors and leaders all had Dana Design Astraplane or Terraplane models for hiking and Bomb or Humbug Spires for climbing. It was the pack of what I deemed the "professional." Eventually, I purchased through a "pro deal" a Terraplane LTW and found out first hand why they dropped the money when we had free Lowe Alpine and Mountainsmith bags available. Cavernous, user friendly features and enough 500 and 1000 denier to survive a nuclear blast, it was amazing. Dana's load bearing hip belt and yoke held unwieldy amounts of weight and they just plain looked cool. As life progressed, there was a period of time where I found myself in need of money and not doing any hiking. As a result, I listed my Salsa colored LTW on eBay and in the years following I didn't notice it's absence. Fast forward a decade, my better half found me obsessing about Dana Gleason's new company Mystery Ranch. Gleason began Mystery Ranch and adopted a "made in the USA" model (after selling off Dana Design some years prior) with the end user focus being military, wilderness firefighter and hunters. A demographic that previously was not acknowledged in his designs. This was precipitated by some Navy Special Warfare guys who approached him with needs for the mountains of Afghanistan. The company's bags and supporting accessories are well received within the communities they were meant to serve. Based on my past success with their products, I found myself the owner of a new Terraplane in mid-2014. Details: At 7lbs, 7oz this 85 liter bag is built from 500 denier cordura. It offers an adjustable yoke to match the hikers height and a padded waist belt with lumbar support along the pelvis. It has a generous removable lid with two large pockets that can second as a "fanny style" pack and a double draw string to seal up the top loading portion of the pack. A zipper for quick access is half way down on one side and compression straps across both sections criss cross both sides directly over two ample pockets for water bottles (holds a large Nalgene). Two tubular pockets run on the backside length of the pack offering quick access to additional layers on a hike or stove/fuel to separate from the rest of your load. My Experience: Despite my great experience with Gleason's designs in the past and my loyalty to his products, I am not happy with the bag's performance. I was careful to ensure it is appropriately adjusted for my frame/height and the belt is the correct size, yet with a 60lbs load the bag is reduced to a $485 book bag. The belt slides down my hips causing my shoulders to take on the burden. This bag is touted to be for loads of 80-100lbs. I called Mystery Ranch and shared photos of me carrying the load, the bag, etc. The company's customer service team was excellent and talked through everything to conclude that it was "just a lot of weight." Honestly, I am not sure how you build an 85 liter pack and then tell the user that 60lbs is too much weight. 60lbs is at the high end of the recommended weight for other 60-70 liter packs on the market. This pack adds 15+ liters of space, but you are supposed to carry 10-20lbs less than someone with a smaller pack? Since that call I have used the bag again on a shorter backpacking trip with a bit less weight. The problems still existed and frustrated me to no end. Add in the fact that Melanie has the Osprey Aura 65 and it rides like a feather while I am constantly being reminded of the load on my back, and you have an unhappy hiker. With modern suspension systems offered from Osprey and lighter, less over engineered materials being used by the majority of other manufacturers, I am hard pressed to recommend this pack to anyone. The price makes it an even more compelling argument. I still have the bag and I'm not sure what I'm going to do at this point. I know it's a bombproof pack, but for the price and the reputation, I also expected it to ride at least somewhat comfortably. I know I should move on but my loyalty to the brand and the design has me saying "just one more time." I guess we will see...Stay safe. Keep Hiking Forward Mike 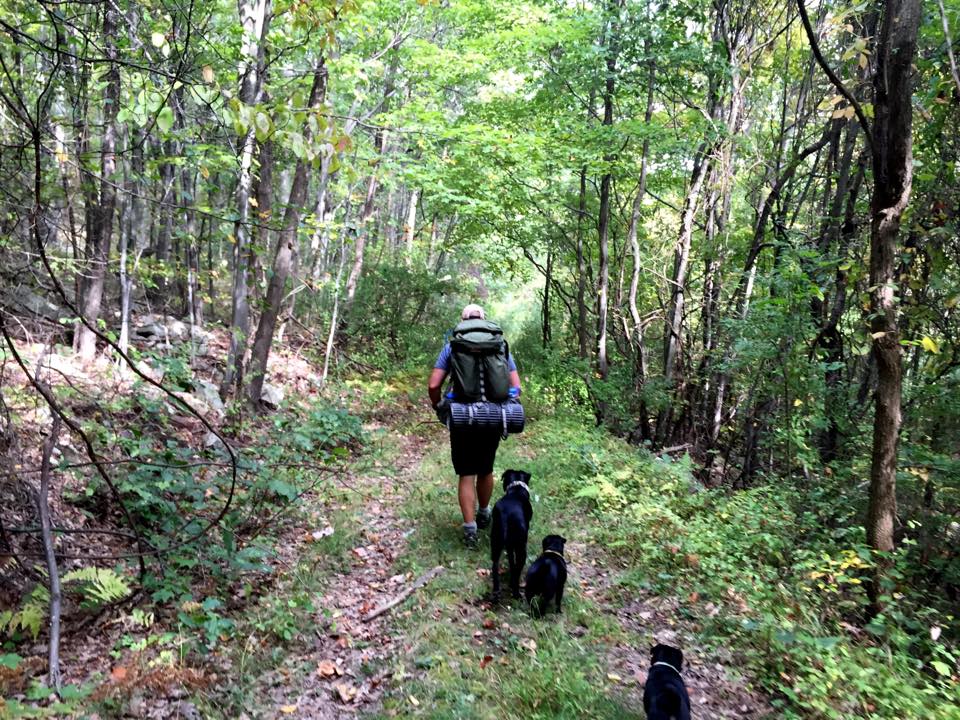 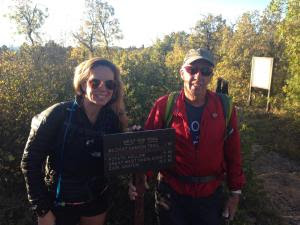 West Rim trailhead West Rim trailhead This time last year, I was fortunate enough to be in Zion National Park. I had been planning the trip for roughly 6 months, and it was a dream come true. Originally it was intended to be a trip by myself to tackle some challenging hikes and spend some quality time with nature. During the summer, while riding the train to NYC to visit friends, I got the idea to invite my dad to join me. He had never hiked before, but I knew he would love the landscape and natural beauty. This was my first experience with navigating the National Park System to this extent. I needed permits, needed to plan routes, lodging, timelines, transportation, and a multitude of other things. In the beginning it was daunting, and the learning curve was steep, but fortunately I had started planning far enough ahead that I tackled it piece by piece. The old saying "How you you eat an elephant? One bite at a time", especially applies to planning these type of trips. My hope is to provide you with some tools and information that will make planning a trip to Zion much easier and less stressful. Decide what "style" you want your trip to be Are you super adventurous and hoping to push your limits? Or do you want to take a more stately pace and really soak in the natural beauty? Are you bringing your kids or family? Do you hope to improve your photography skills? If you plan on doing a lot of hiking, how far can you reasonably hike in one day?  Zero dark thirty shuttle ride Zero dark thirty shuttle ride Answering those type of questions will help you narrow down things like the best time of year to visit, how much time you will need to visit, what sort of skills and/or gear do you need to acquire prior to your trip, etc. All the National Parks I have visited thus far have a wide variety of things to offer to people of all ages and skill levels. Popular trailheads along the shuttle routes and areas near the visitor's center, for example, closely resembles the crowds and infrastructure you would expect at Disney World. It's a great place for families hoping to expose their kids to some natural beauty, but those of you who crave solitude might find it claustrophobic and annoying. Many parks are somewhat limited by weather and have areas that are closed during certain months. Zion is open year round, but your itinerary will still dictate what time of year is best to accomplish your goals. For example, I knew I wanted to visit when it wasn't too hot or too cold, and I wanted little risk of rain. I planned on hiking the Narrows which is prone to deadly flash flooding, so limiting the chance of rain was a priority for me. The website has a great guide to the different seasons and weather that will help you decide. If children will be accompanying you, the National Parks do a great job of setting up activities geared toward them. Ranger talks are awesome, and there are usually lots of other Youth Programs designed to help little ones engage in nature and get the most out of their visit. Gather Intel The NPS websites are usually very thorough and great with helping to plan. I recommend always starting there. Once you have some ideas of what you are planning, other sites like Trip Advisor have great forums where you can read other people's questions and answers and reviews, or post your own questions. Be sure to check the park website often during planning for alerts and updates like road or trail closures or other issues that might affect your trip. Transportation Zion, like most National Parks, has an excellent shuttle system within the park. In fact, from March-October, the shuttle is the ONLY way to get around inside the park. The town of Springdale is right outside the park's gate, so if you are lodging there, you can literally walk to the shuttle and get to most of the destinations in the park. There are also shuttle services run by the Zion Adventure Company that cater to those who need to get to remote trailheads. You'll need to plan ahead for those and make a reservation. You will also need to show up on time because they WILL leave without you. I used them to get to the Lava Point trailhead and the Chamberlain's Ranch trailhead for long day hikes. While these trailheads aren't too far away as the crow flies, the shuttle to Lava Point took about 1 hour and 15 minutes and the shuttle to Chamberlain's Ranch took close to 2 hours. 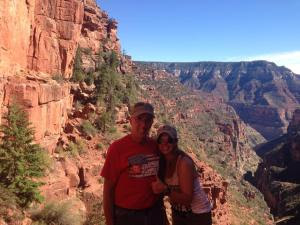 North Rim, Grand Canyon North Rim, Grand Canyon Route Planning
As soon as you think about planning your trip to Zion, you'll want to get a good map. The NPS website has a pretty good hiking guide, but it doesn't really get into many longer routes or loops. There are some awesome websites out there with great hike reviews, namely the Citrus Milo site. Compare the trail map with the routes described for the best details on the routes on to decide which routes best meet your goals and abilities. Many hikes are accessible directly from the various shuttle stops throughout the park, and there are hikes of all distances and ability levels. Generally though, the easier the hike, the more crowded the trail will be. We opted to hike the West Rim Trail from Lava Point to the main canyon. This is usually done as an overnight backpack, but we did it as a day hike, and if you are up for it, I definitely recommend it. As I said, I also did the Narrows (top down) as a thru hike. I do think if I opted to do the Narrows again I would do it as an overnight. It was very mentally challenging to be in the water for 16 miles in one day. Permits Ahhh, my favorite subject, permits. My experience with getting permits for hiking in Zion was a good one, though I know certain trails are very competitive. I applied for several different permits and was successful in being granted all of them. I only needed a permit for my thru hike of the Narrows, so I was able to cancel the others. Permits are required for the following: ALL thru hikes of the Narrows and its tributaries, all canyons requiring the use of descending gear or ropes, and all trips into The Subway and Left Fork, and any overnight wilderness trips. Apply for your permits as soon as possible to hopefully get them well in advance of your trip. Walk up permits are available as well, but you'll be waiting in line and it's still a crapshoot. Once you have been notified that you have a permit, the fun is not over. You will still need to report to the visitor's center to pick up your permit the day before your hike. Getting to Zion The easiest and most inexpensive way I found to get to Zion was by flying into Las Vegas and renting a car. The drive from Vegas to Zion is one of the most spectacular sights I have ever seen, so if you can plan do do your driving while it's light out, I highly recommend it! The town of Springdale is really easy to navigate, it's basically one road through town with lots of hotels, restaurants, etc. along the way. Most things are within walking distance and we found everyone to be friendly and helpful. Because Zion is so popular, you'll want to make hotel reservations as early as possible. There are hotels in literally every price point, from budget motels to luxurious hotels, so do some research and find the right hotel for your needs. Nearby Attractions Zion is located relatively close to many other awesome attractions, so if you have the time, you might want to plan some excursions to these areas.Bryce Canyon, the Grand Canyon (North Rim), and Antelope Canyon are all within a couple hours of Zion. We opted to visit the Grand Canyon since my dad had never been there. Antelope Canyon is great for photographers, from what I've heard. Bryce Canyon could warrant a few days on it's own, and I hope to visit there in the future. Final Thoughts You really can't go wrong with a trip to Zion. The more you navigate and plan trips like this, the easier it gets. But the great thing about our National Park system is that no matter where you go, you will find incredible natural beauty, a well organized infrastructure, and helpful rangers and employees to help you make the most of your trip. Keep Hiking Forward Melanie |
Hiking Forward Stickers
Archives
July 2018
Categories
All
 |
